Learning to sew really made life easier when it came to shopping. I love thrift shopping, and coming across a shirt that didn’t fit me right was always disappointing. Years of practicing and experimenting eventually helped me look past sizes and buy whatever I liked if I was down to put in the work to fix ’em up.
I thought I’d write up a post sharing my method of resizing shirts. This post was written to downsize, so if you came across a shirt you want to make smaller, carry on!
Make note, I’m not a pro. I’m completely self taught, and this is how I do.
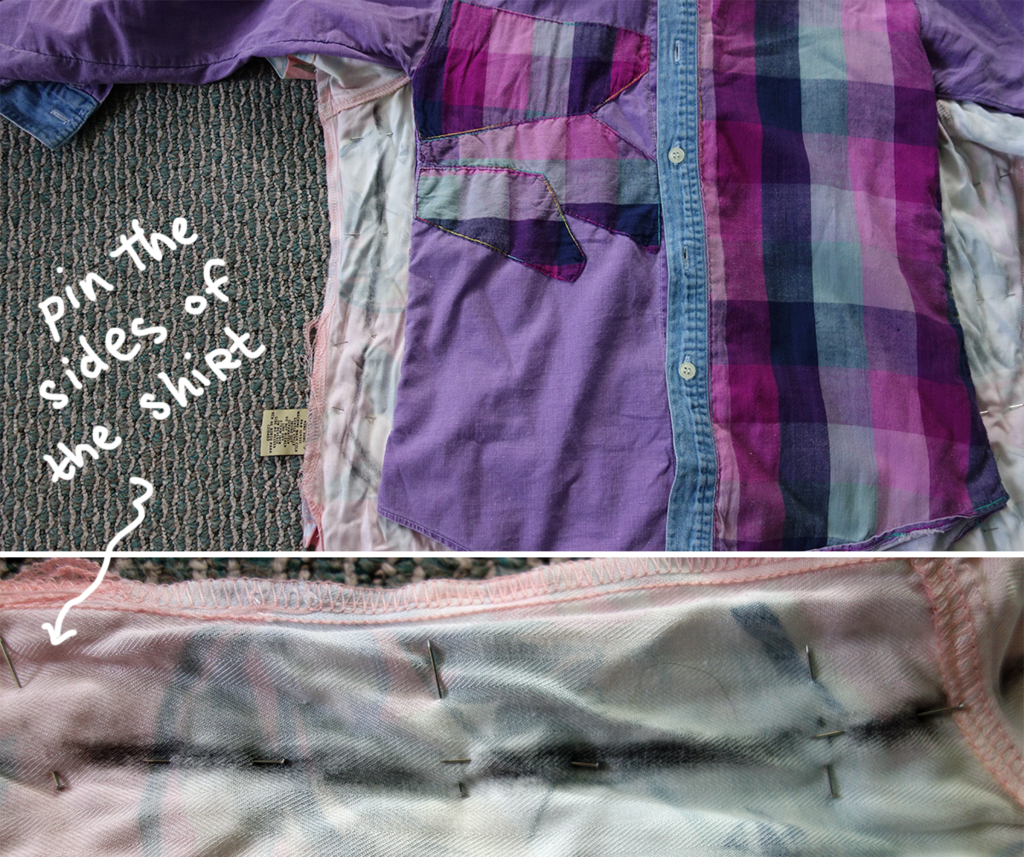
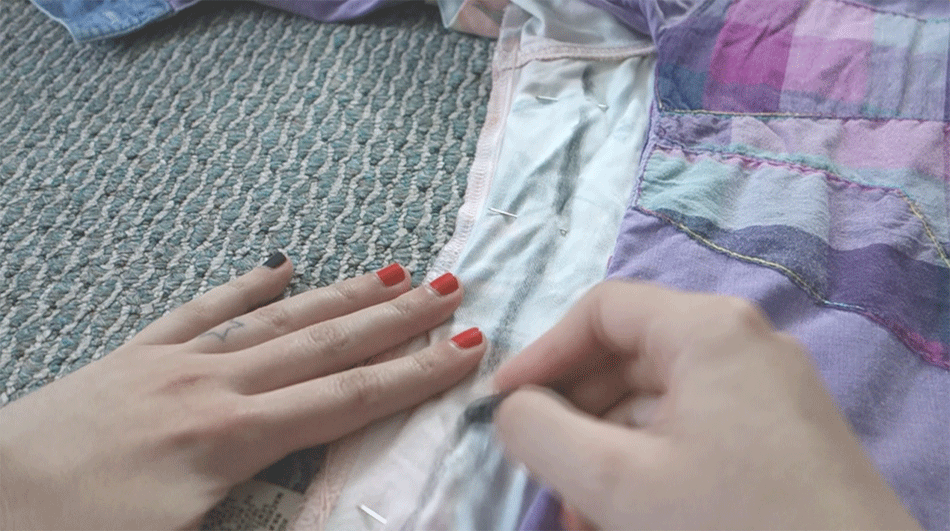
Keeping the style in mind that I want to create, I find a shirt that fits me well as a template. I turn the larger shirt inside-out and lay it down flat, pinning the sides to keep it from shifting. I lay the shirt I want to mimic on top, aligning the collars. I find a pencil and I draw a line tracing the sides of the smaller shirt, leaving about a centimeter or more of space for breathing room.
Once I trace just the body, I cut the bottom of the shirt if it’s too long, and then sew down my pencil lines.
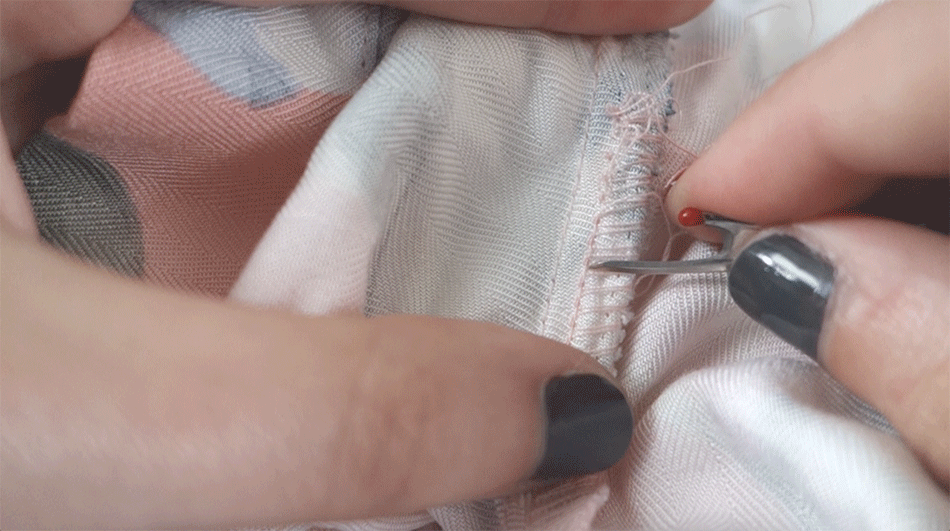
After the sewing, I use my handy dandy seam ripper to take off the sleeves.
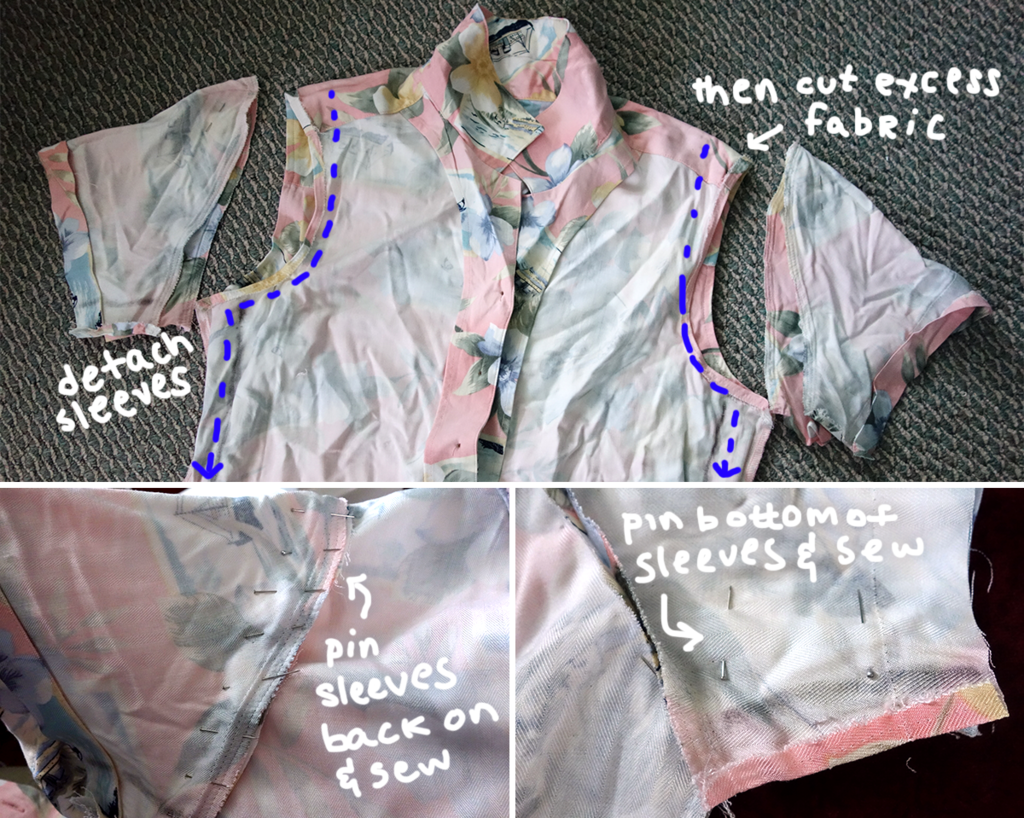
After both sleeves are off, I cut the excess fabric off the sides of the body leaving another centimeter between where I cut and the stitch. I cut all the way up following the shape of the armhole up to the shoulder (like the blue dashes shown in the image above).
So when the excess fabric is cut, I pin the sleeves and sew them back on. I usually wait till after sewing to figure out how much to cut off from the bottom of the sleeves, in which I sew start sewing from the bottom of the armhole to the end of the sleeve.
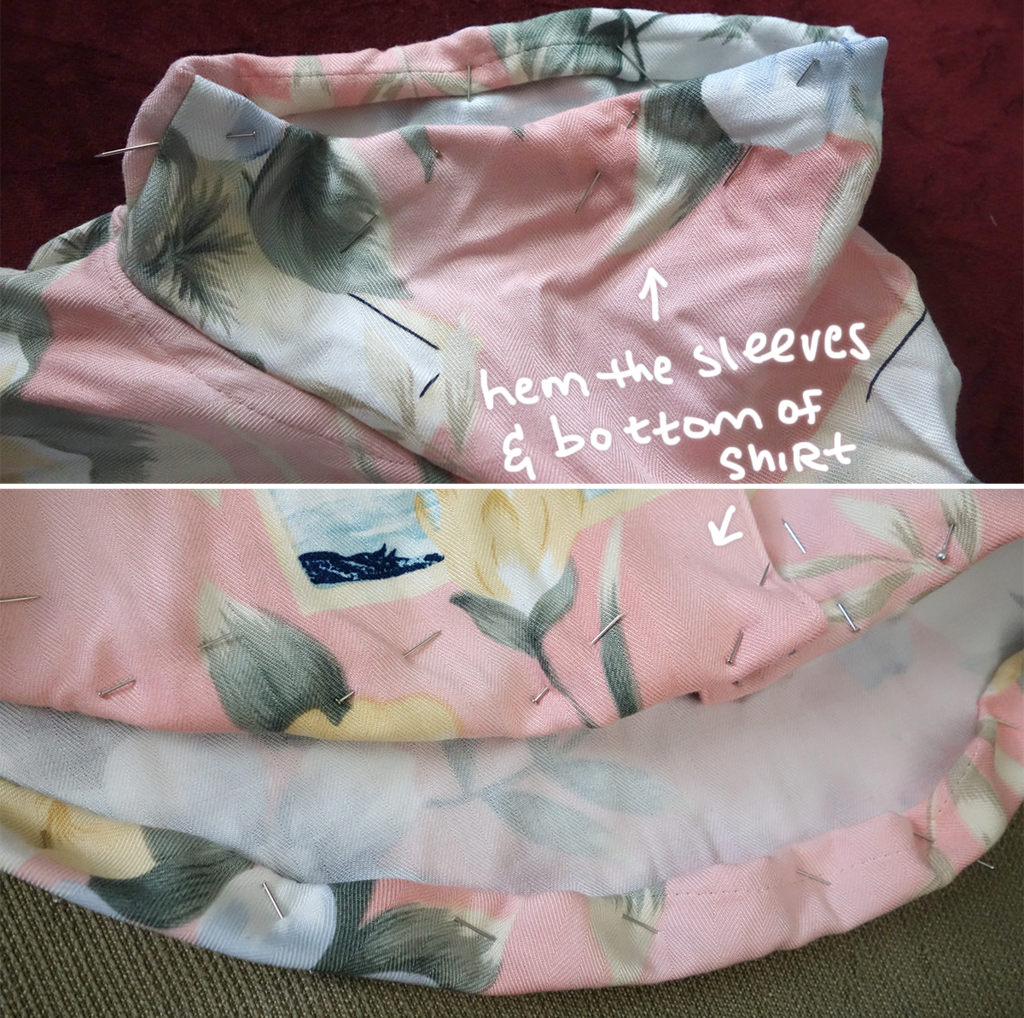
The reconstruction of the body and sleeves are all done, so all that’s left is to hem the sleeves and bottom of the shirt. I made the decision to flip under twice to avoid fraying. When the pinning is done and I double check to make sure everything is even, I sew two parallel lines of stitches to reinforce the hem.
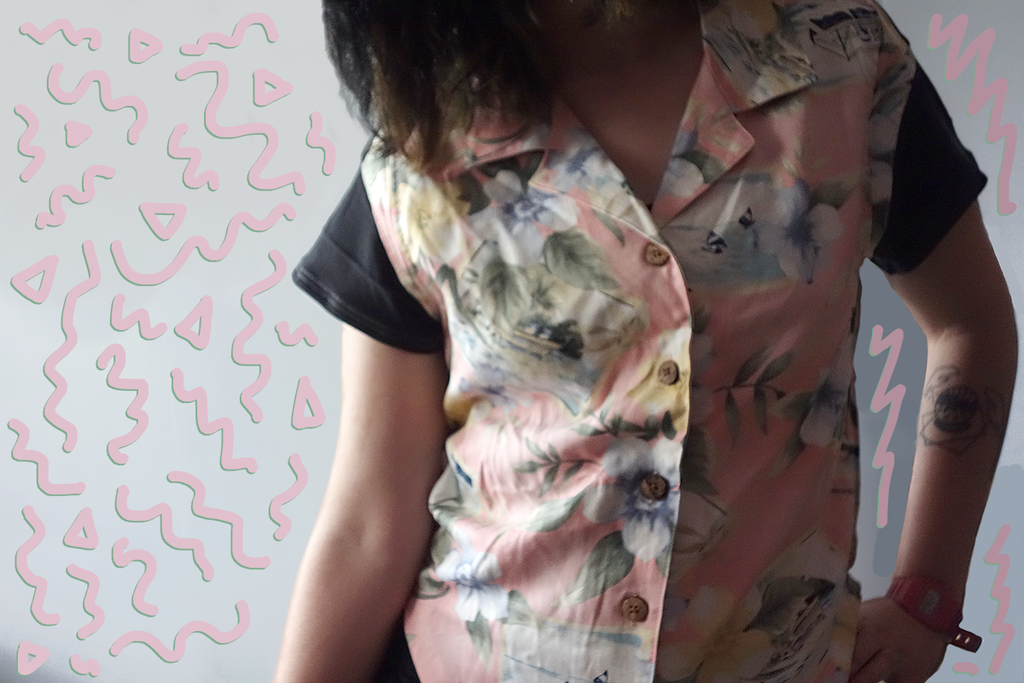
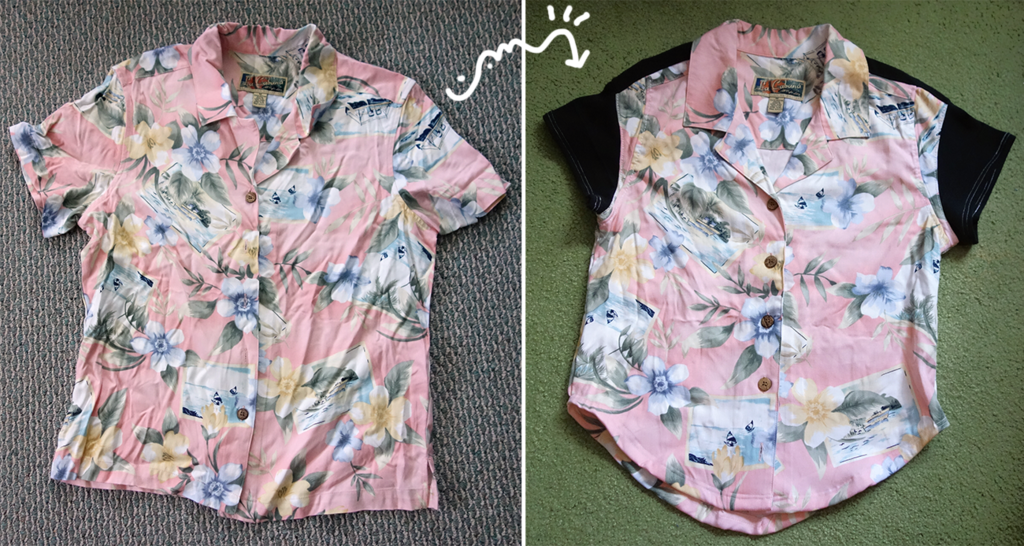
Of course, in the middle of reconstructing, I made the decision to do some tweaking playing around with the sleeves (adding black sleeves), sewing a curved hemming on the bottom of the shirt, and adding thin black stripes from the collar to the shoulder.
It’s fun changing up the style a bit, so if you feel confident making a few changes in the middle of construction, do it up!
So there you have it. I tried to explain the best I could, so if you have questions, feel free to ask away!

★ Follow on Instagram @oddballera ✚ on Bloglovin' to keep up with this blog ★